
Happy Birthday US National Parks! August 25 marks the 100th birthday of the NPS system. Here’s how to pack your carry on so you can take advantage of any park near your destination – even if you have a business trip.
Visit a national park with only carry on luggage
I’m a little biased when it comes to the US national parks. I served as a volunteer in park (VIP) for decades (SEKI, LABE, HAVO). I think every visitor and citizen of the US should enjoy this wonderful resource. There are hundreds of parks within the NPS system and you may find one near your destination (hint: look at nearby states too). There are even parks in urban areas. You only need to make slight modifications to your packing strategy to prepare for your visit. You can even go camping (yes, I’ve done it). Here’s how to go about it:
Clothing
I’ve found that clothing is actually the easiest part of packing when it comes to park travel. It becomes even easier if you have created a wardrobe using the capsule wardrobe core and extender pieces. If you are traveling for business, make sure you have included one pair of travel pants, a tee shirt, a sweater, and a long sleeve shirt in your wardrobe. Make sure your casual shoes have a good tread. Bring your raincoat, leggings and long underwear if you expect cooler weather or if you are camping. These don’t take up much space but will be useful when you head outside. I find that darker neutrals work well in both a business and outdoors environment. The color suits business norms and also hides dirt. Win!

These outdoors oriented items may already be a part of your capsule wardrobe. They’re perfect for hikes and camping. The puff jacket, hat, gloves and base layers only take up a little bit of space in your carry on. Bring them along on business trips for your rest days.
Day Hiking Gear
I like to spend my time outdoors so I’ll always pack equipment for day hikes. You might get a day off on your travels. I’ll bring the following items:
- Light weight packable day pack – a comfortable day pack is critical for enjoying any trail. I usually bring my Wanderlite packable day pack. I’ve dragged the thing across four continents, up mountains, into caves, and it keeps on going. At 9 oz it’s not the lightest pack, but it is rugged. You don’t need a heavy padded pack for day hikes. Learn to pack properly and you can go with thinner, lighter, material. Hint: line the back of the pack with soft items like your rain gear and sweater. That way you won’t get poked in the back. That same sweater will protect your back against pokes if you are wearing it.
- Headlamp – I like the convenience of a headlamp instead of a smaller flashlight. You can’t drop a headlamp if it is on your head! Mine charges via USB, which means I don’t have to worry about batteries. I get several hours out of a charge.
- Collapsible water bottle – My water bottle holds 1 liter, which is enough for a light hike. It has a carabiner clip on it so I can attach it however I want. Platypus sells a drinking tube that turns your water bottle into a hydration system. I also strongly recommend the valve cover. I will sometimes buy extra water at the grocery store when I have a hot or long hike. It’s easier and lighter than carrying a second collapsible water bottle. Pick up some trail food while you’re at the store. Nuts, oranges, trail mix, sausage sticks and mozzarella sticks are nearly indestructible.
- First aid kit – I bring a few zip lock bags, duct tape (bandages), a few safety pins, and pain medicine. That’s all I need. I suggest taking a wilderness first aid course if you want to travel lighter. More knowledge is less gear.
- Plastic bags – smaller bags store food and clothing. larger bags are additional rain protection. Set aside one bag as a garbage bag for your food. Pack it all out!
- Wonderous key chain – This has a small compass, a wilderness whistle, a bottle opener, and a GI can opener. The Suunto mini compass is quite accurate.

A key chain clip is an easy way to keep all the little bitty things from getting lost.
- Sunscreen and bug protection – I’ve had some pretty bad reactions to the chemicals of sunscreen and bug juice. I prefer to bring my own products from home. I’d like to suggest using Picaridin as an alternative to Deet. The CDC says it’s just as effective and it won’t eat your synthetics or plastic items. I also bring SPF 85 and higher sunscreen. I’m very sensitive to the sun, and burn with SPF 50. Don’t forget that rash guards provide chemical free sun protection.
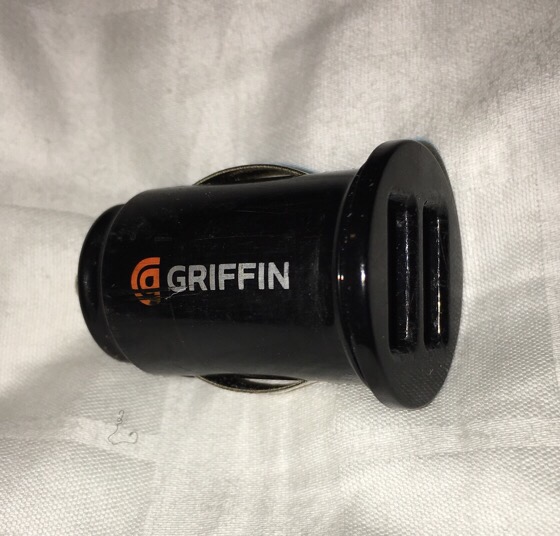
- Auto USB charger – This is especially useful when you get back from your hike. Power sources are hard to come by in the great outdoors (thank goodness!) You may need to charge your smart phone for reading at night. Oh, and you’re using your phone for pictures too, right? You can also recharge your USB headlamp. A dual port charger eliminates fights if you have multiple people in your party.

This mini automobile USB charger guarantees power when car camping.
- Power pack – This is useful if you are wandering away from your automobile. You’ll have a better park experience if you disconnect completely from your device. With that said, a power pack is handy in a pinch.


Pack these items in your carry on and you’ll be set for a great day hike. Add in your rain jacket, a sweater, and some snacks.
Location Specific gear
Some locations and seasons will need a few more pieces of gear. You may want to bring along rain pants for the rainy northern or eastern parks. You will also want rain pants for the mountains and backpacking. You’ll definitely want a packable sun hat for southern or western parks. Make sure the hat has a chin strap – it can get windy in the outdoors!

Consider taking some specialty gear if you think you’ll encounter weather outside the norm.
Camping/Backpacking
Camping with a carry on bag is a slightly bigger challenge, but still possible. I would recommend renting gear instead of bringing it along. TSA makes it difficult to pack sleeping bags and tents into your carry on bag. It’s almost impossible to bring a used stove via airlines any more. Security thinks you’re going to use the fumes to blow up the plane (could someone please send these guys to a chemistry class?). While TSA technically allows used stoves, I’ve almost always encountered resistance from individual TSA employees. In the end, they win. They also think that tent poles are some sort of weapon.
I’ve found it easier if I look up gear rental places near my travel destination. The gear is usually older and heavier, but it works well enough for my trip. I find that the modest rental price is better than hauling camping gear around for the rest of the trip. I also don’t have to clean and dry the gear when I’m done! This principle also works for specialty items, like snorkel gear. REI has a lot of good equipment for rental. I’d also suggest Googling “camping rental near (park name)”.
I find that I still want to bring a few of my own items. I almost always bring a silk liner with me. You want a liner if you are renting a sleeping bag. The liner is small and adds some warmth at night. It’s the perfect cover for hot, humid summer nights.
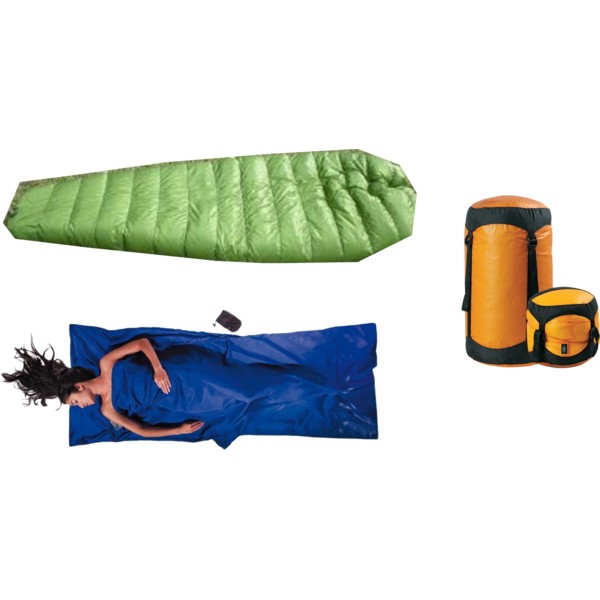
Sleeping bags and liners are the easiest things to bring in your carry on. If you bring a sleeping bag then use an ultra light weight compression sack to reduce bulk.
A note on entrance fees
Some of the larger national parks have high entrance fees of $30. Here’s what people don’t know – many times fees are dependent on the size of the park. Please check the website of the park you plan to visit. Some parks don’t charge at all! There are also several park pass programs that reduce the cost of the entrance fee. The America the Beautiful pass is an annual pass that covers the entrance fee for everyone in your vehicle. If you are a senior (over 62) a lifetime pass is $10.
Get on out there!
Don’t restrict your activities because of carry on travel. You only need to slightly modify your gear for outdoors activities. I would recommend going over to a National Park even if you don’t have much time or gear. The visitors center almost always has some sort of interpretive exhibit. There are usually a few easy trails near headquarters. They don’t require much of a commitment or a lot of support gear. Please talk to the rangers at the information station. They will listen to your needs and make appropriate recommendations for your visit. I’d also suggest attending an interpretive program. They are free and you can learn so much about a special part of the park! Have children? Get them involved in a Junior Ranger Program.
National parks are one of the truly great ideas that comes from the USA. Celebrate innovation – visit a national park today!
